Knowledge Base
A Concise Negative Mask Removal Workflow
Revision V 2.01 After scanning, a color negative usually cannot be viewed directly. It must be inverted, its film-base color compensated, and its density and color rebalanced before it approaches the positive image we are used to. This process is often called "removing the mask", but in practice it includes file preparation, white balance, cropping, inversion, channel alignment and basic post-processing. This workflow is revised from miscLab's film negative-mask guide and is intended for beginners processing color negatives for the first time. It does not treat any software or plug-in as the only answer; instead, it offers a way of working that can be judged, rolled back and refined.
I. Before You Start: File Conditions
Before removing the mask, first check the working file. Many problems with color casts, banding and limited adjustability are not caused by post-processing technique; the file has already lost too much information before it enters post-production.
Working File
Use RAW or 16-bit TIFF. Avoid 8-bit files where possible, and avoid JPEG files where possible. 8-bit JPEG can be used for preview, but it is not suitable as the master file for a rigorous mask-removal workflow because curves, channel and saturation adjustments are more likely to produce banding.
Color Space
For camera-based scanning that preserves RAW files, post-processing can use ProPhoto RGB / 16-bit. Traditional scanners should usually follow the device's own color space, such as Adobe RGB, rather than forcing an unsupported space onto the file.
File Size
Checking file size before starting mask removal helps avoid wasted work. Ideally, the short edge of the file should be larger than 4000 px.
Software
A basic workflow can use a Lightroom + Negative Lab Pro combination. This provides quick preview and basic mask removal, but its stability and success rate are not high. For a standard workflow, a Photoshop + ColorPerfect combination is recommended. For advanced workflows, such as a "physical mask removal" method, the Photoshop curves method is recommended.
What to Judge
First look at the film border, unexposed base, shadows, highlights and areas in the image that may be close to neutral. Mask removal is not about forcing every photograph into a standard color; it is about recovering a positive image that can continue to be color-graded within a reasonable range.
II. Example File: Judge the Negative First
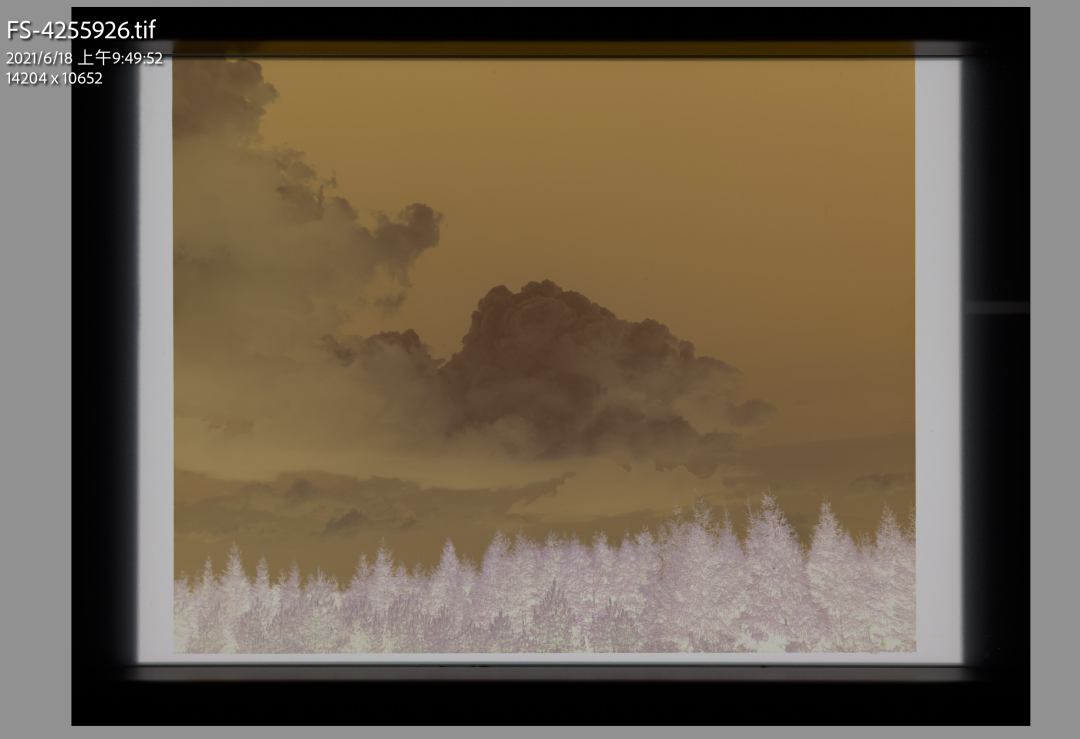
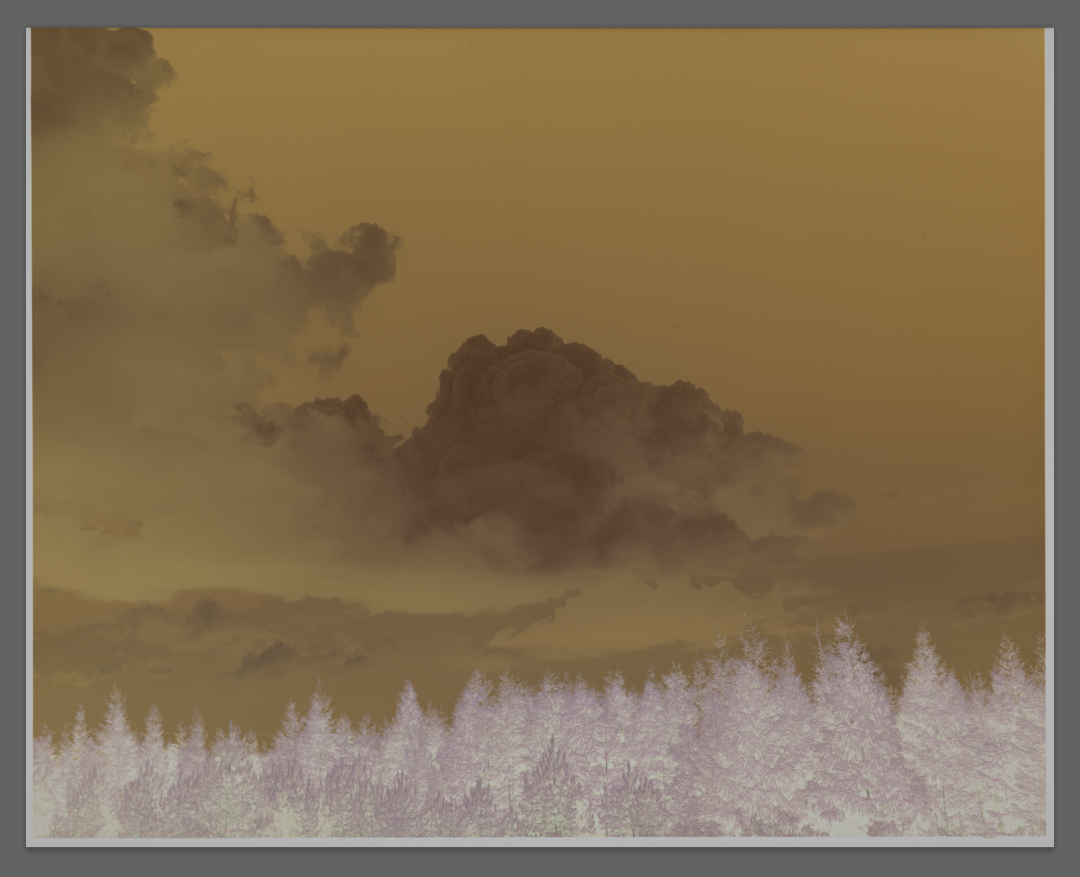
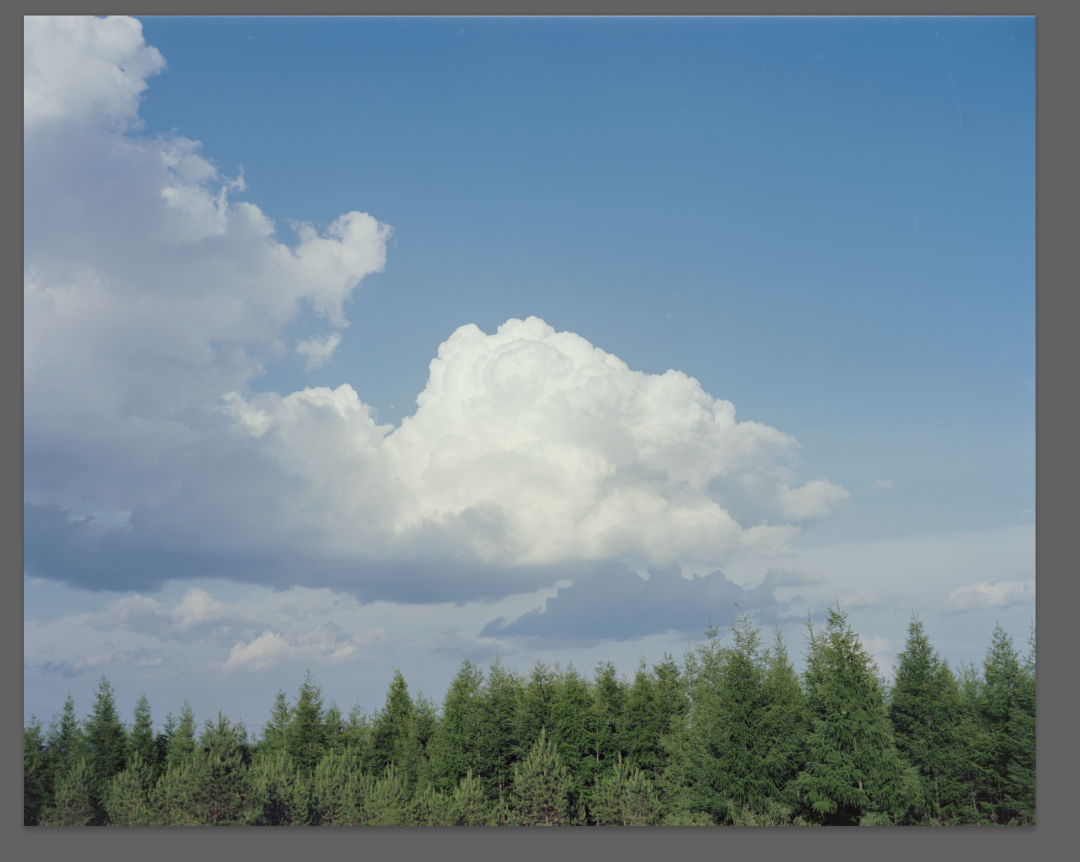
After opening the negative, do not rush to invert it. Check three things first: whether the image is obviously over- or under-exposed; whether the film border is complete; and whether the main highlights and shadows still hold detail. The example below is a color negative scan with an obvious film-base color. Its border, image density and sky highlights help determine the following workflow.
III. White Balance and Border Cropping
In Lightroom or ACR, you can first use the white-balance eyedropper on the film border or unexposed base so the later inversion starts from a more stable point. This is not the final color correction; it simply reduces the most obvious base-color cast to a more manageable range. Cropping depends on the next method. When using plug-ins, a small amount of border can be kept for judgment. When using the curves method, it is better to crop the border completely, because the border creates extra peaks in the histogram and can lead to incorrect black- and white-point alignment in the RGB channels.
IV. Quick Preview: Negative Lab Pro
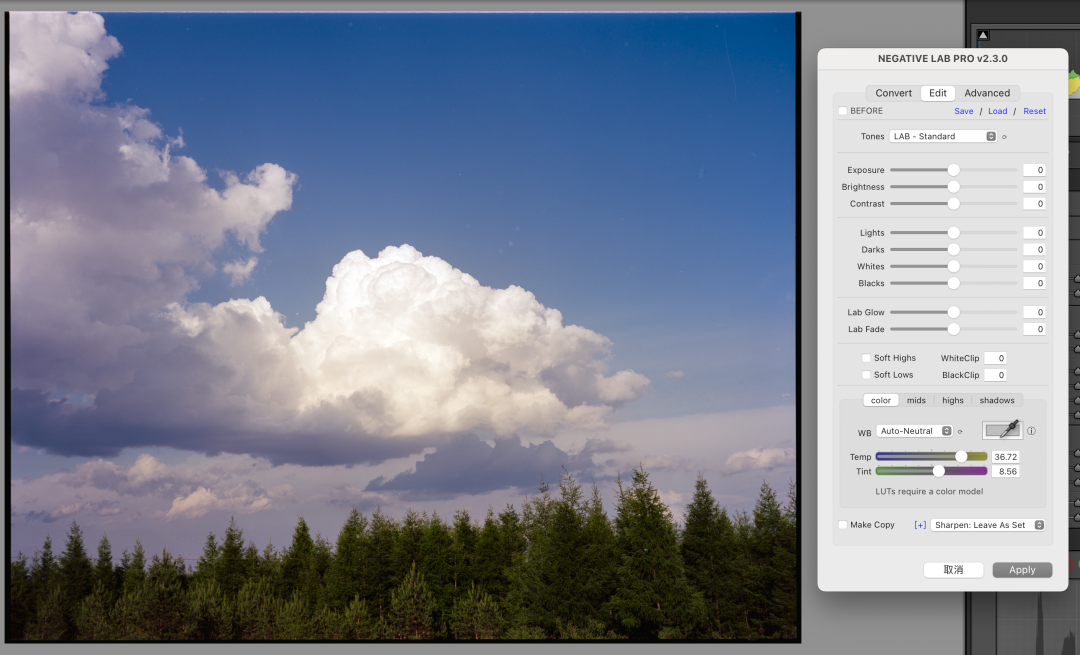
Negative Lab Pro is useful for quickly previewing whether a negative is broadly workable. It is easy to use and can turn a negative into a positive quickly, but the result is not always the most stable or controllable final color. Beginners can treat it as a checking tool: if Negative Lab Pro quickly produces a near-normal result, the scan exposure and base condition are probably acceptable; if it produces severe color casts, color patches or density problems, the negative is not necessarily unusable. You can continue with Color Perfect or the manual curves method.
Suitable For
Quick selects, exposure judgment, and preliminary references for clients or yourself.
Not Suitable For
Using the default result directly as final color, especially for high-contrast, overexposed, underexposed or mixed-light images.
Beginner Tip
Use it once for preview, then keep the original file and continue with a more controllable manual or plug-in workflow.
V. A Higher-quality Starting Point: Color Perfect
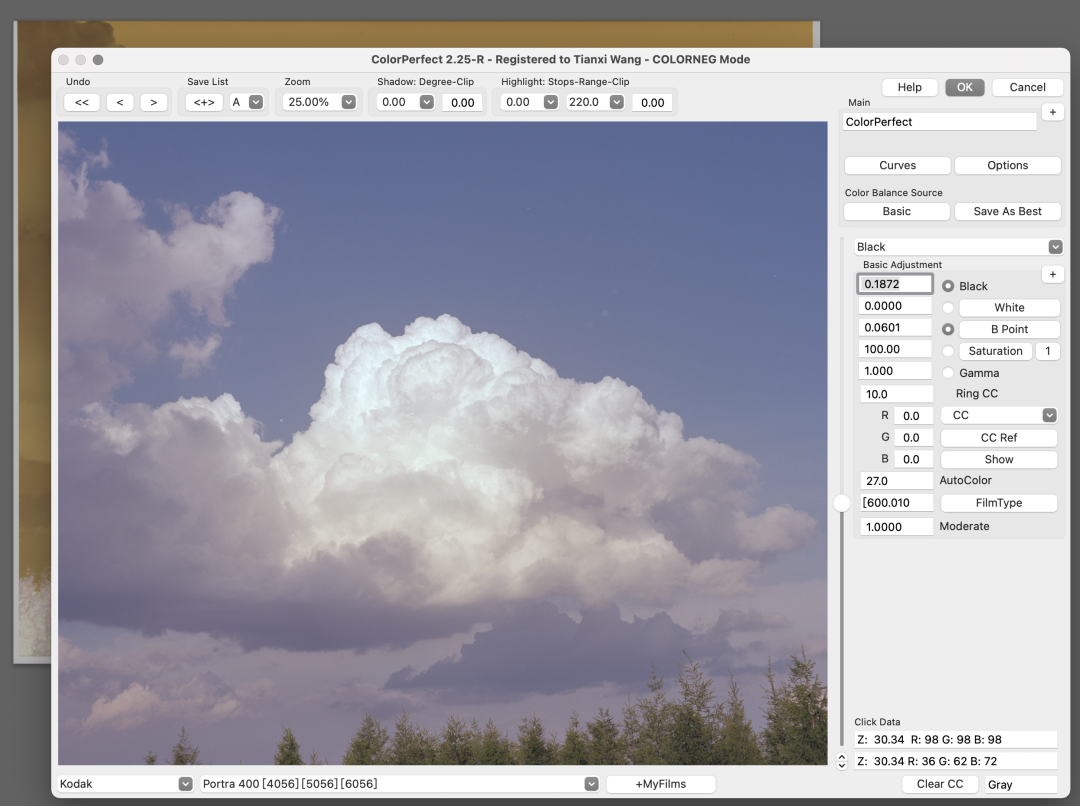
Color Perfect is a Photoshop-based mask-removal plug-in. Under good conditions, it can produce a conversion file that is very suitable for further post-processing. The key phrase is "suitable for further work", not "immediately the prettiest result". It is sensitive to scan quality and exposure accuracy, and especially benefits from 16-bit TIFF. With overexposure, underexposure or insufficient channel information, it may create additional color casts; but when the source file is good, it often provides a more stable starting point than quick-preview plug-ins.
Advantages
Clear conversion logic, suitable for high-quality negatives; the result is usually closer to a neutral master that can continue to be graded.
Limitations
The interface is not very intuitive and it requires good 16-bit TIFF, exposure and scan quality; poor source files need extra correction.
Judgment Standard
Do not judge only whether the first impression is pleasing. Check whether highlights, shadows, skin tones or neutral colors still leave room for further adjustment.
VI. Manual Curves: Establish the Inversion
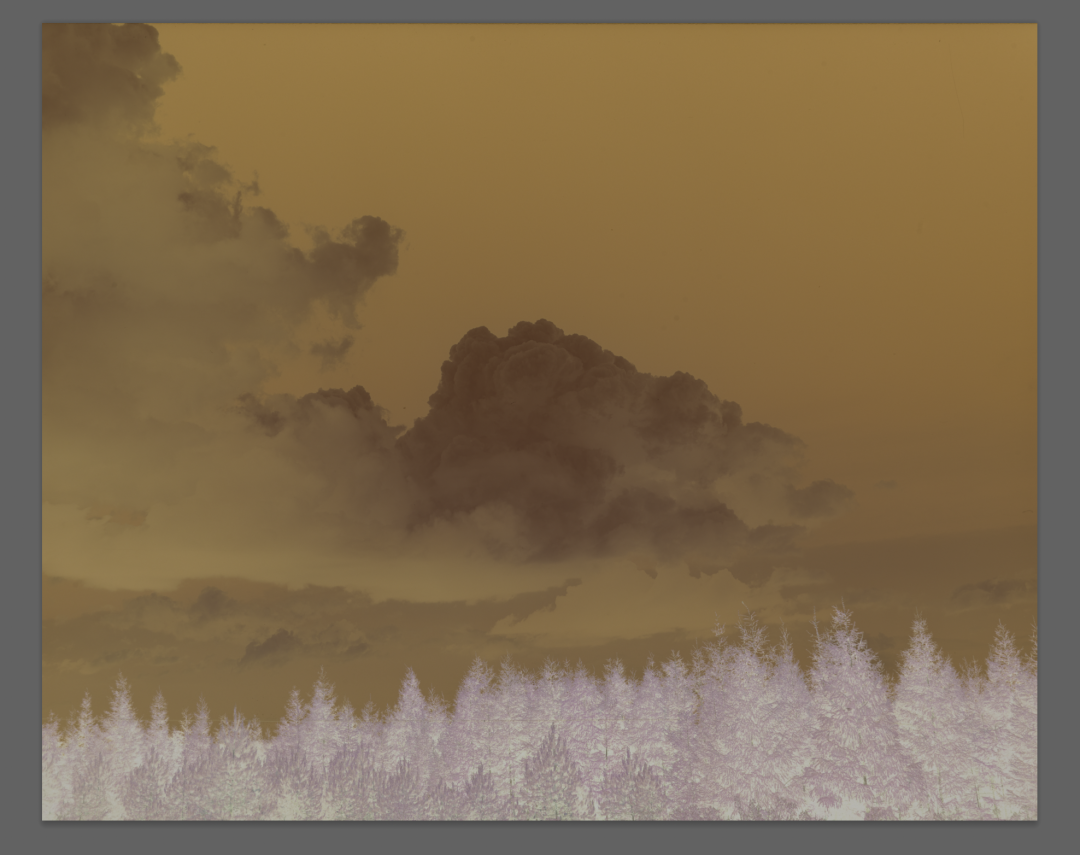
The curves method does not depend on plug-ins, applies broadly, and helps you understand the essence of negative-mask removal. Before starting, crop the film edge cleanly. Then create a Curves adjustment layer and swap the lower-left and upper-right endpoints on the master RGB channel so the curve runs from upper left to lower right. This creates the basic inversion. Use an adjustment layer rather than destructively changing the original. If you later find that the inversion, crop or white-balance starting point is wrong, you can roll back at any time.
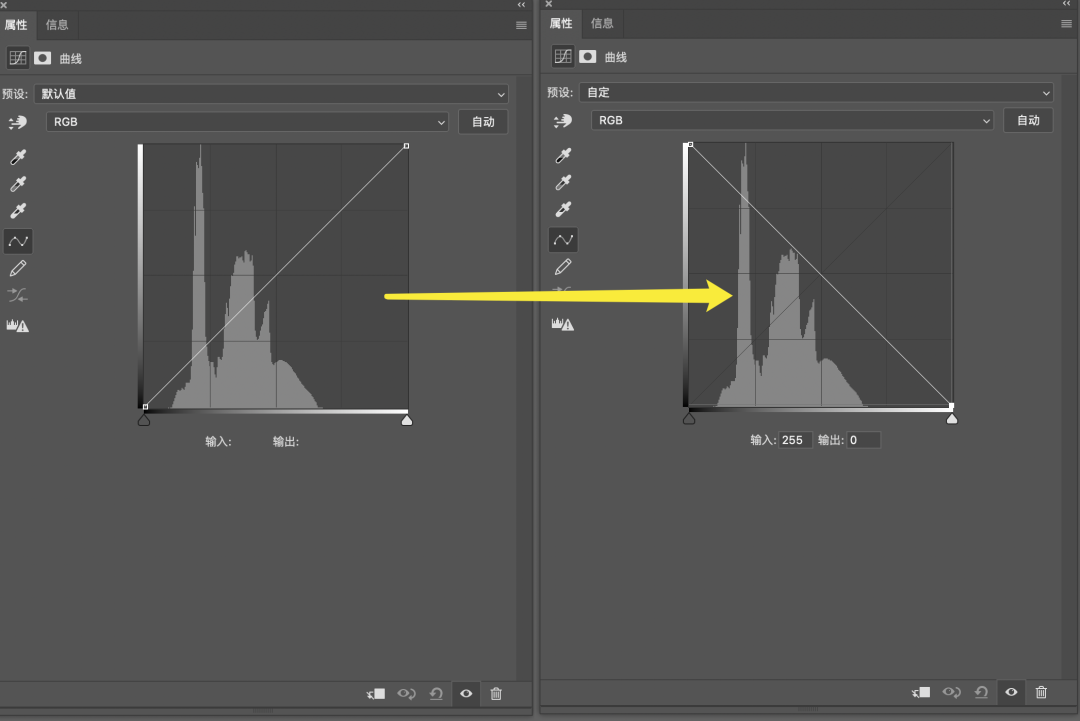
VII. Manual Curves: Align the Histogram
After inversion, enter the red, green and blue channels separately and move the endpoint sliders of each channel curve to the boundary of useful histogram information. This rebuilds the black and white points for each color channel and is the key step in removing most of the film-base color. Do not clip subject information in pursuit of "pure black and white". Watch the image while dragging the sliders: sky, highlight clouds, skin and shadow detail should not suddenly disappear. If the border was not cropped cleanly, extra peaks appear at the histogram edges and can mislead the sliders into the wrong positions.
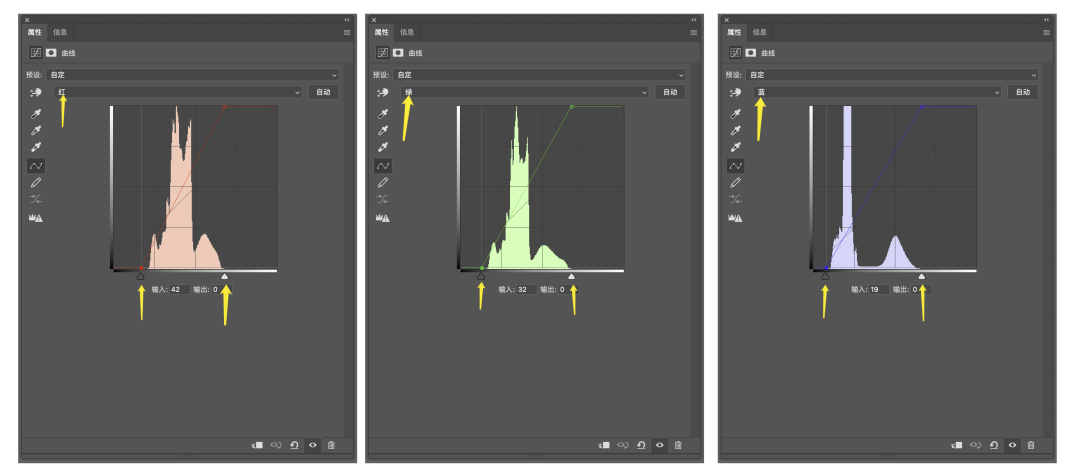
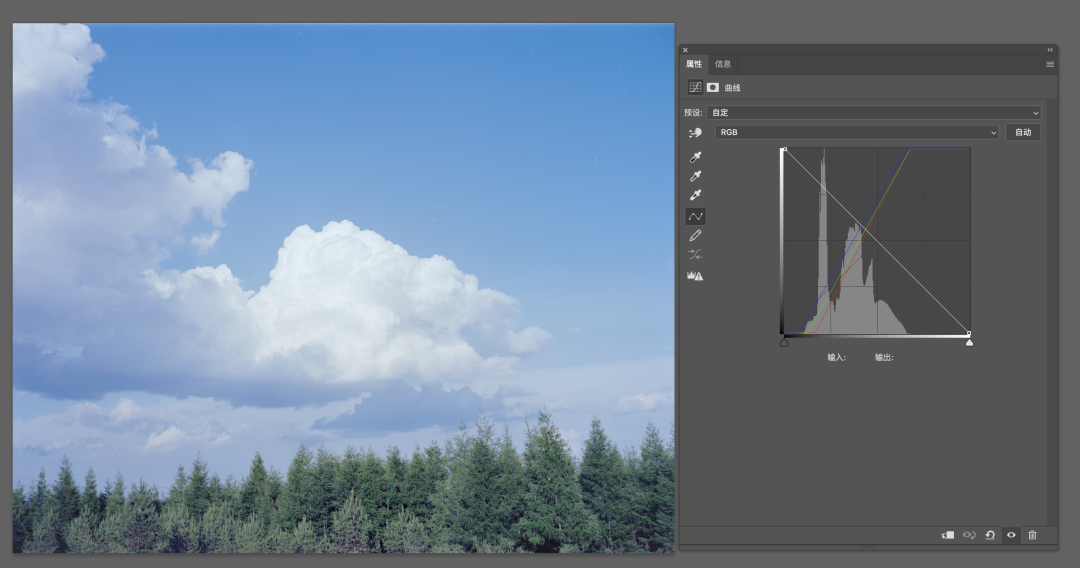
VIII. Manual Curves: Fine-tune Channels
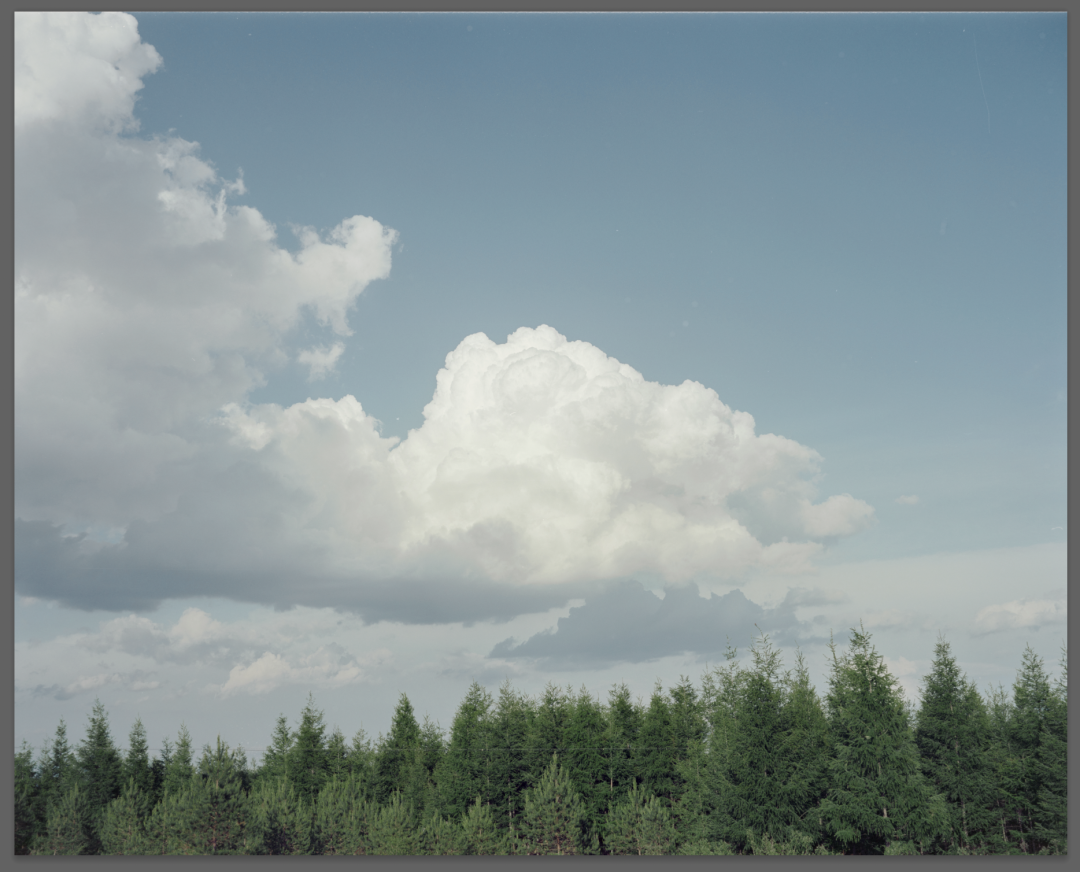
After histogram alignment, the image is usually close to normal, but it may still look cyan, red, yellow or generally gray. Continue with small corrections in individual RGB channel curves: move only midtones or local ranges, not endpoints by large amounts. When judging color, first look at objects that should be close to neutral, such as clouds, gray walls, white clothing, black shadows or known scenes on the film. If there is no neutral object, judge by the overall credibility of the image rather than forcing an "absolutely correct" color.
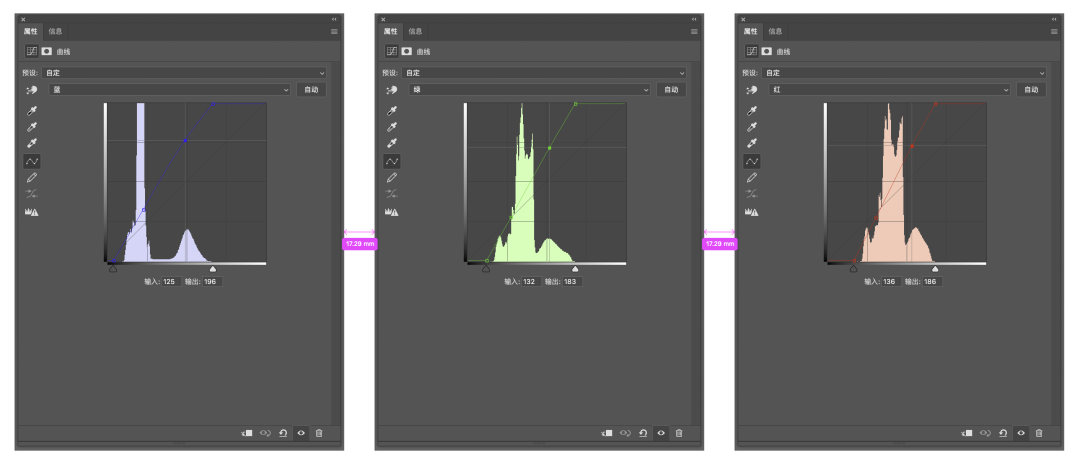
IX. Basic Post-processing and Output
After mask removal, the image has only reached the state where it can be post-processed like an ordinary photograph. At this point, convert the result into a smart object and apply Camera Raw Filter to continue adjusting white balance, exposure, contrast, saturation, local brightness and minor color casts. Keep a layered PSD or TIFF as the working file, then export JPEG according to use. For web and social media, export sRGB. For later printing, fine-art inkjet or long-term preservation, keeping a 16-bit TIFF with full layers is more reliable.
Master
Keep the original scan file and a layered file containing curves, plug-in output or Camera Raw smart filters.
Web Preview
Export sRGB JPEG, with size and compression controlled according to the display platform.
Further Production
For printing, fine-art inkjet or publication, deliver 16-bit TIFF first and preserve a wider color space and sufficient resolution.
X. Common Questions
There is no completely fixed standard answer for negative-mask removal. The following questions can serve as troubleshooting entry points: first determine whether the problem comes from file conditions, then whether it comes from cropping, white balance or channel endpoint settings.
Severe color cast after inversion
First check whether white balance was sampled from the unexposed film base; then check whether a remaining border caused histogram endpoints to be affected by false peaks.
The image looks gray and muddy
This usually means the black and white points were not aligned to the useful information boundary, or later midtone contrast is insufficient. First handle curve endpoints, then fine-tune contrast.
Highlight clouds turn white with no detail
The highlights may already be overexposed during scanning or capture, or the curve endpoints may have been pushed too far. First return to the original file and check channel information.
Skin tones or plant colors look strange
Do not correct the entire image with only one channel. Try adjusting only the midtones in a single-channel curve, and make small HSL corrections in Camera Raw.
Colors are inconsistent within the same roll
First build a baseline from one normally exposed negative, then copy the adjustment to other frames in the same roll. Each photograph still needs fine-tuning according to exposure and scene.
Can it be done with only JPEG?
It can be used for practice and preview, but is not recommended as a formal workflow. 8-bit JPEG is more likely to show banding and compression artifacts during curves and color adjustments.
XI. Recommended Beginner Workflow
- First confirm the file is RAW or 16-bit TIFF, and keep the original scan file.
- Use the film-base area in Lightroom / ACR to make a basic white-balance adjustment.
- Duplicate the file, crop the border, and make at least one quick preview with Negative Lab Pro.
- If the file quality is good, try Color Perfect to obtain a starting point suitable for further post-processing.
- If plug-in results are unstable, switch to the Photoshop curves method: invert, align channel endpoints and fine-tune individual channels.
- After the initial mask removal, convert to a smart object and use Camera Raw for ordinary photographic post-processing.
- Finally save both the layered working file and the exported file for the intended use.